Quiet Book From Scratch: A Beginner's Guide

To make a quiet book from scratch, you cut felt pages, add a hands-on activity to each one, then bind the stack with rings, and yes, a total beginner can finish a first one over a weekend. I’m Nora Hayes, a former preschool aide and mom of a sensory-seeking 7-year-old, and I’ve stitched these for my own kids and the moms in my living-room group for years.
What follows covers the materials, the page count to aim for, the order to build in, and the mistakes that send a quiet book to a drawer instead of a child’s lap.
The plan in brief:
- Cut 6 to 8 felt pages plus two cover panels for a first book
- Build each page flat with fabric glue or a simple backstitch before assembly
- Bind the finished pages with binder rings in about a weekend
What a Quiet Book Is and Why Felt Wins
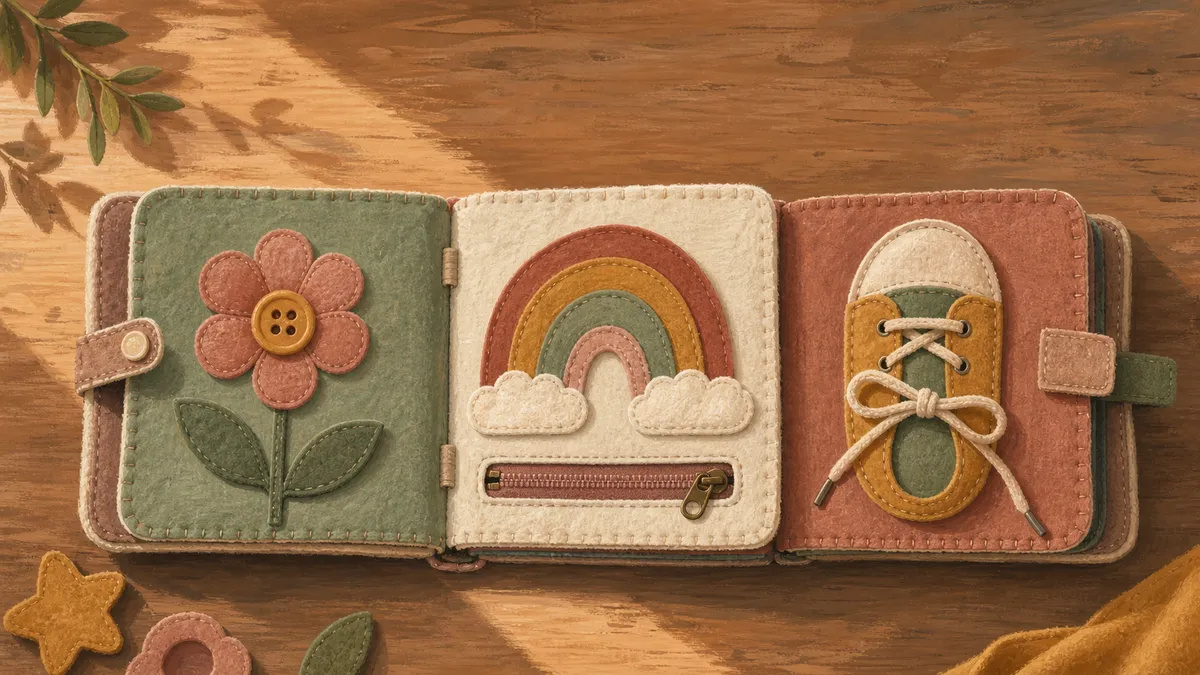
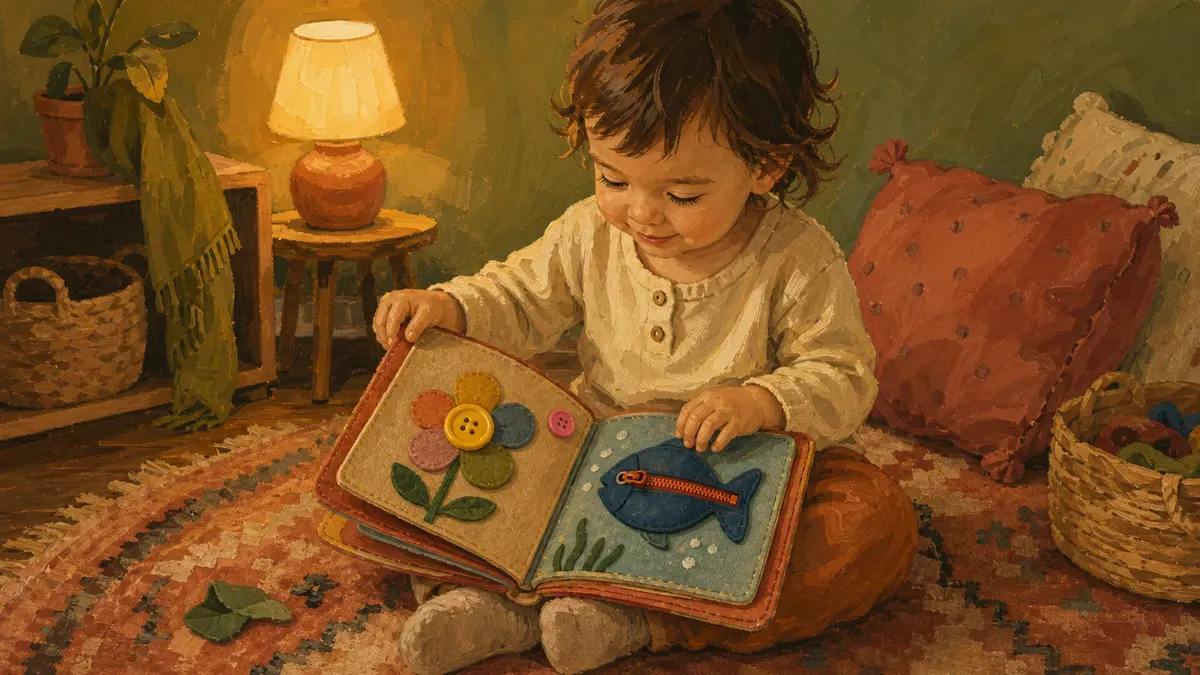
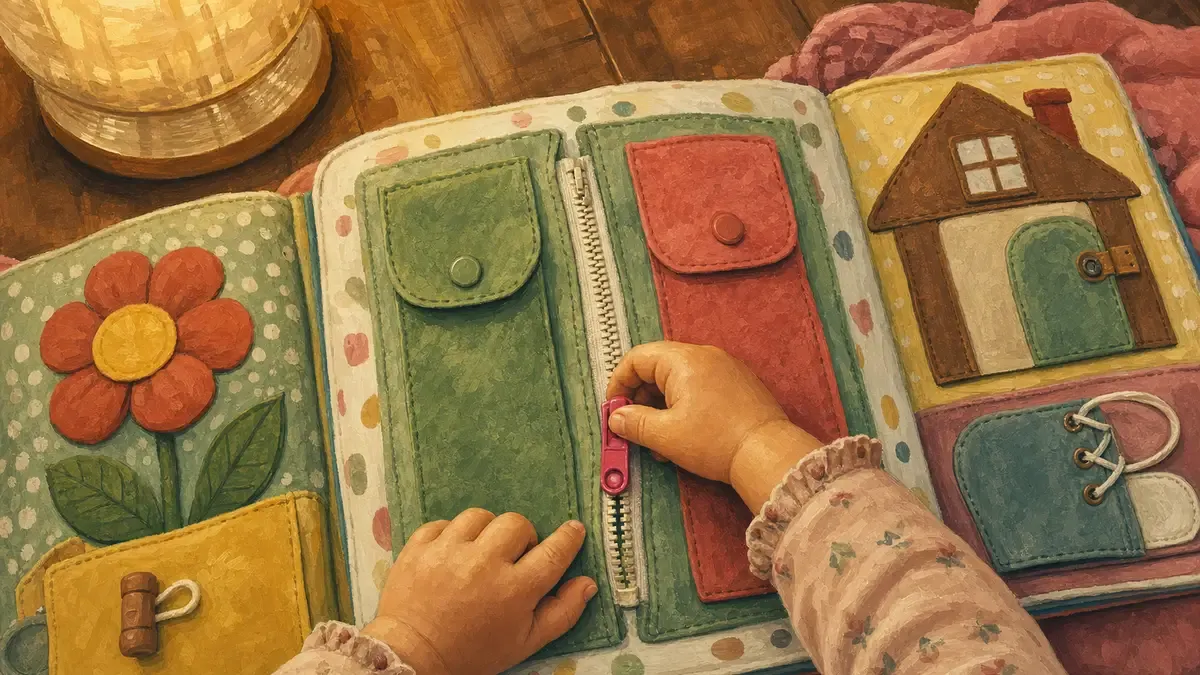
A quiet book is a small handmade book where every page does something. A button to fasten, a shape to sort, a zipper to practice. No batteries, no screen, just a toddler’s hands working through a page at a time.

The activities aren’t decoration. They’re the whole point. Quietly occupied hands are occupied brains, and for a toddler who needs something to do with their fingers, a well-made page can hold attention longer than most toys that cost twenty times more. That’s why these activity books show up in OT waiting rooms and airplane carry-ons and Sunday church bags.
Felt is the go-to material for a reason.
- No fraying when you cut it, so hemming is skipped entirely.
- Sticks to itself, bonds cleanly with fabric glue, and takes a needle without puckering.
- A yard runs about a dollar.
- No serger, no specialty notions, and very little sewing experience required.
The fine motor skills practice is real, but honestly? The main reason to make this diy project is that it works. Kids pick it up.
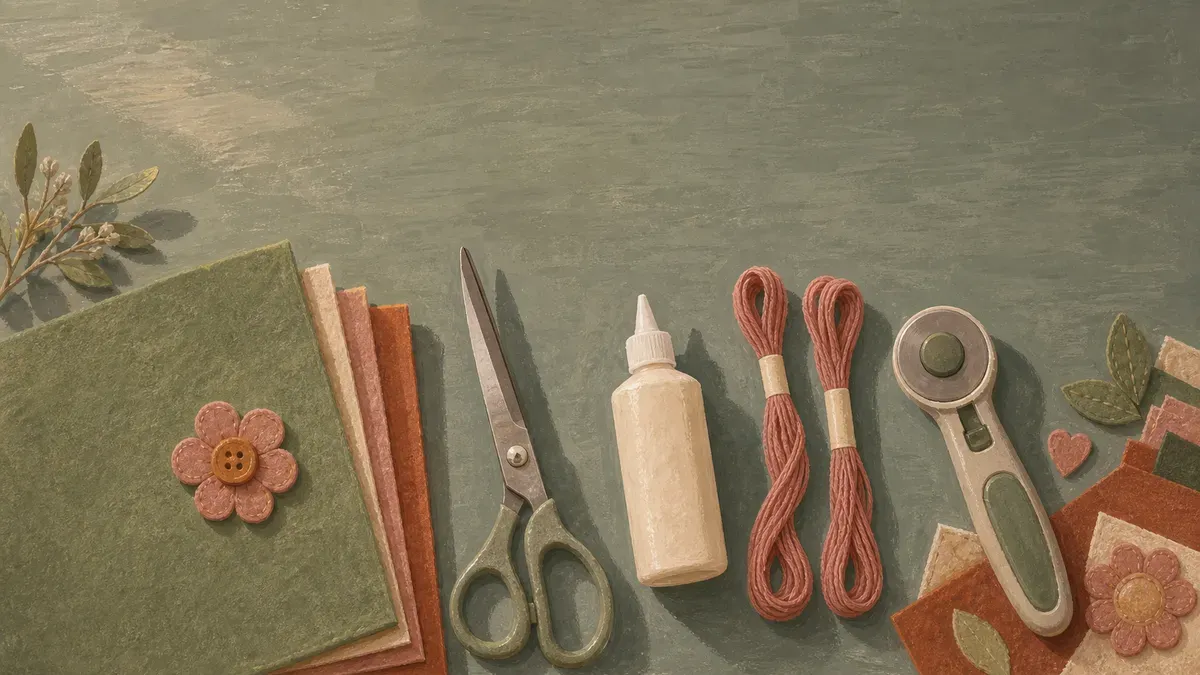
Gather Your Materials and Tools
Before your kid can pick anything up, you have to build the thing, and that starts with a small pile of supplies you mostly already own. Here is what goes in the cart, what does the work, and where you can skip the sewing machine entirely.
The Felt and Fabric You Actually Need
Felt is the whole reason this project is beginner-friendly, so start there. For pages that survive a toddler, reach for wool blend felt over the bargain-bin craft stuff. A wool blend typically runs around a quarter to two-fifths wool with the rest rayon or acrylic, which makes it tougher than cheap felt while staying thin enough to stitch through. The cheap acrylic sheets pill and tear by week two. Ask me how I know.
You will also want a bit of cotton fabric for the page backing and some cotton batting to slip between layers, which gives each page that soft, slightly padded feel kids love to squish.
That no-fray rule is already covered in the intro, but this guide to felt fiber types and weights explains the nonwoven construction if you want the details.
Felt is the one fabric you can cut and use as-is, which is exactly why beginners should start with it.
Closures, Thread, and Cutting Tools
The play lives in the little stuff. A book becomes interactive the second you add things that open, stick, and fasten, so grab a strip of velcro, a card of snaps, and a handful of chunky buttons. Those are the moving parts your kid actually fiddles with.
For stitching and applique, embroidery floss is your friend. It is thick, it comes in every color, and you can split it down for finer work. One skein goes a long way.
Cutting is where most beginners lose an afternoon. Skip the scissors for the straight lines. A 45mm rotary cutter on a self-healing cutting mat is the recommended starter setup for fabric, and it slices clean through several felt layers at once. Pages line up, edges stay square, and you keep your sanity.
Sew or No-Sew: Pick Your Path
Here is the part nobody tells beginners: you do not need to sew at all. Fabric glue holds felt shapes down just fine, and fusible webbing does even better. It is a polyester web that melts under a home iron and bonds two fabric layers permanently, no needle required. A sheet of freezer paper under your iron keeps the mess off your board.
That said, if your kid pulls hard, a few stitches add real reinforcement. The backstitch is the strongest hand stitch you can do, because each pass overlaps the last, so it holds up to tugging where glue eventually gives.
- Fabric glue or fusible webbing for a fully no-sew build
- Backstitch for closures and edges a toddler will pull hard
- Mix the two: glue the shapes, stitch what needs to hold
For more budget ideas, my guide on the cheapest way make quiet book has the full breakdown.
Pick the path that fits the kid in front of you. Glue tonight, stitches later. Both end up in little hands either way.
Make a Quiet Book Step by Step
The whole method in three steps:
- Measure and cut all pages to a matching size first.
- Work each activity page to completion before touching the next one.
- Layer the finished pages in order and bind the spine.
The order matters more than your craft skill.
Cut and Prep Your Pages
Get every page identical before anything fun goes on top. Mismatched pages are the thing that makes a finished book look wonky, and there is no fixing it later.
Pick one base size and stick to it. Pages usually run about 7½ to 9 inches square, and 8¼ inches makes a comfortable starting point that gives little hands room to work. Anything under 7 inches feels cramped once you add activities.
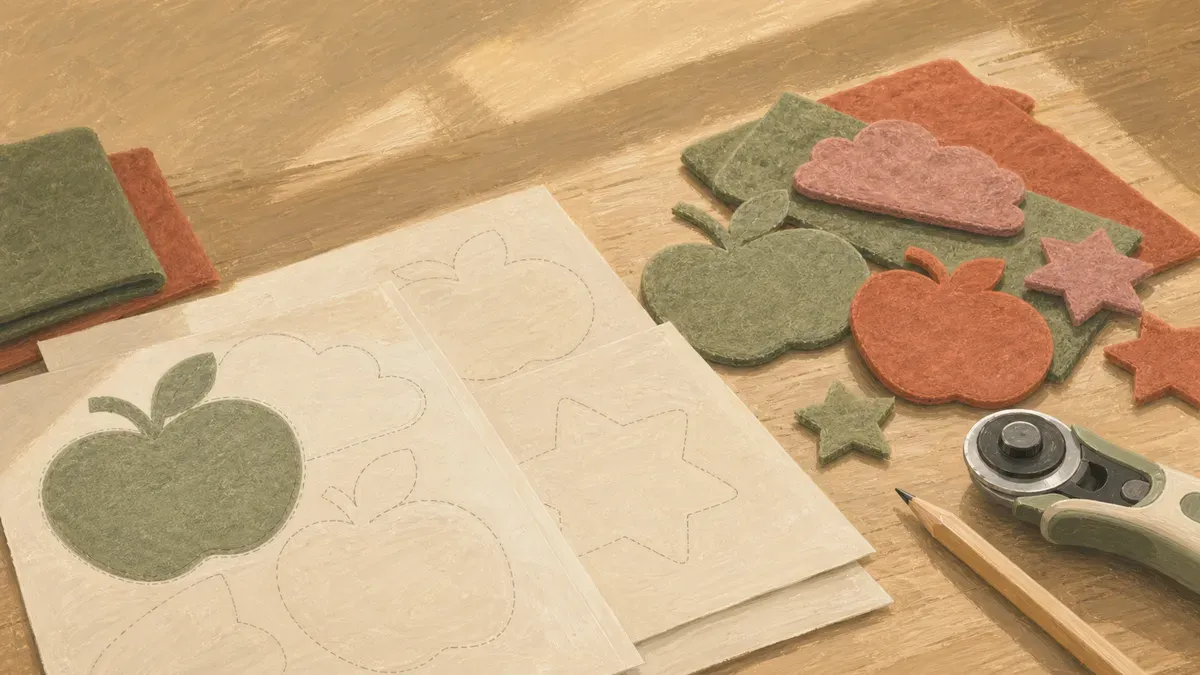
- Rotary cutter: run it along a ruler on your mat for straight, repeatable cuts.
- Freezer paper templates: iron the paper shiny-side down onto your felt for a few seconds, cut around it, peel it off, and reuse the same template on the next page. No marking needed.
Cut your felt pages as double pages, two panels you sew or glue back-to-back, so each finished page has a clean front and back. Stack them up and eyeball the pile. Even edges now mean a book that closes flat later.
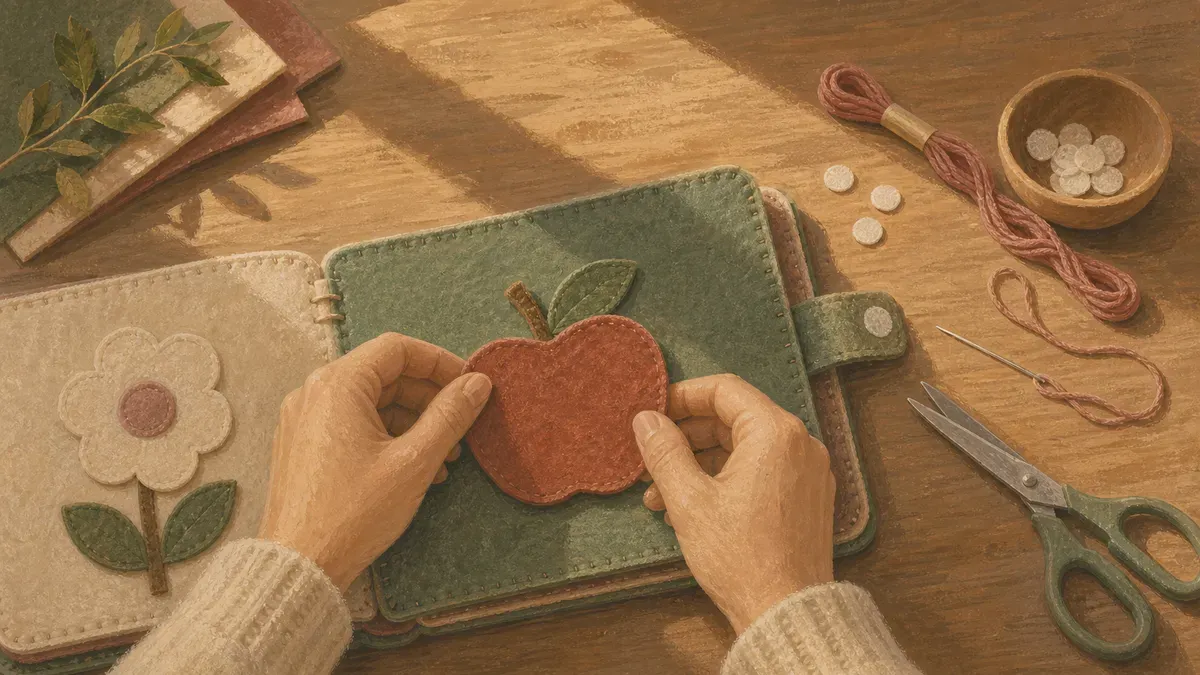
Build the Activity on Each Page
Work one page at a time, flat on the table, and finish it completely before you touch the next. Trying to run all six pages at once is how pieces go missing.
Start with the background, then layer your applique on top. Cut your shapes, the apple, the cloud, the little shirt, and position the whole scene before you commit to anything. Layering is just stacking smallest on top of largest so nothing important hides underneath.
Attach each piece based on how much handling it will take.
- Fabric glue: a thin line around the edge holds shapes that stay put. Fine for the no-sew crowd.
- Backstitch: anything a toddler will yank, pull, or chew gets sewn down. It’s the stitch that takes the abuse.
- Velcro: sew the soft loop side to the page and the hook side to the loose piece. Gives you that satisfying rip for matching games and removable pieces.
Press each finished page flat and set it aside. One done page beats six half-done ones every time.
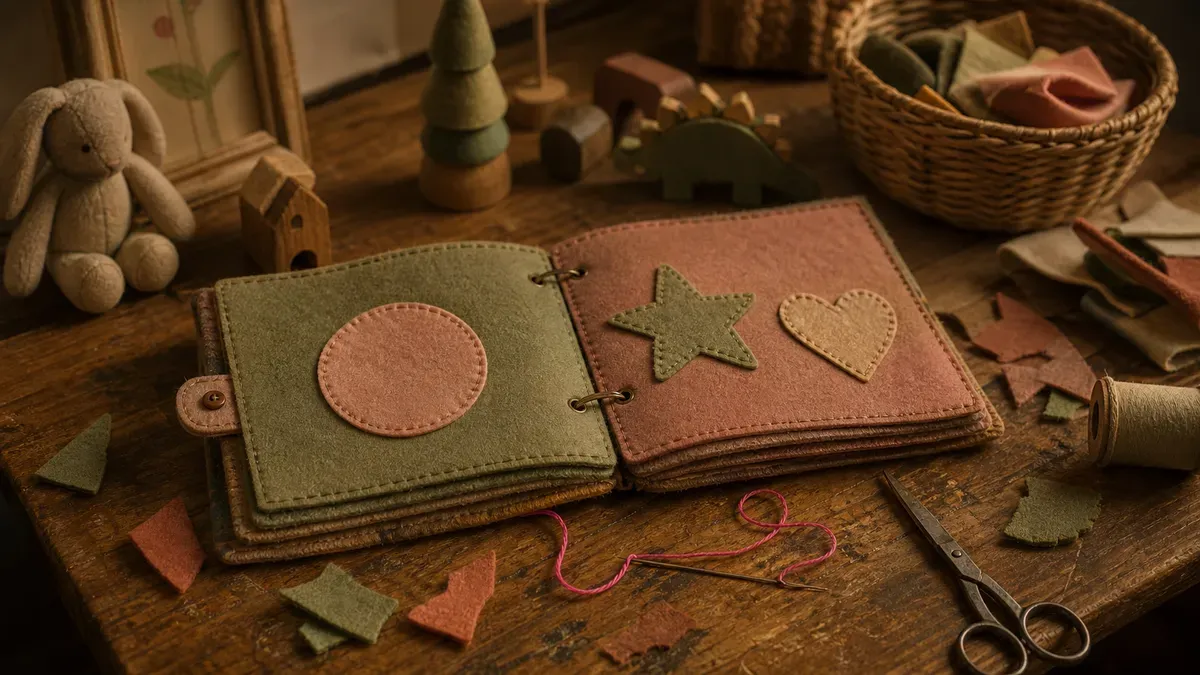
Assemble and Bind the Book
Lay your finished pages in the order you want them, covers on the outside, and decide on the spine. The binding is what turns a stack of pages into something that survives daily handling.
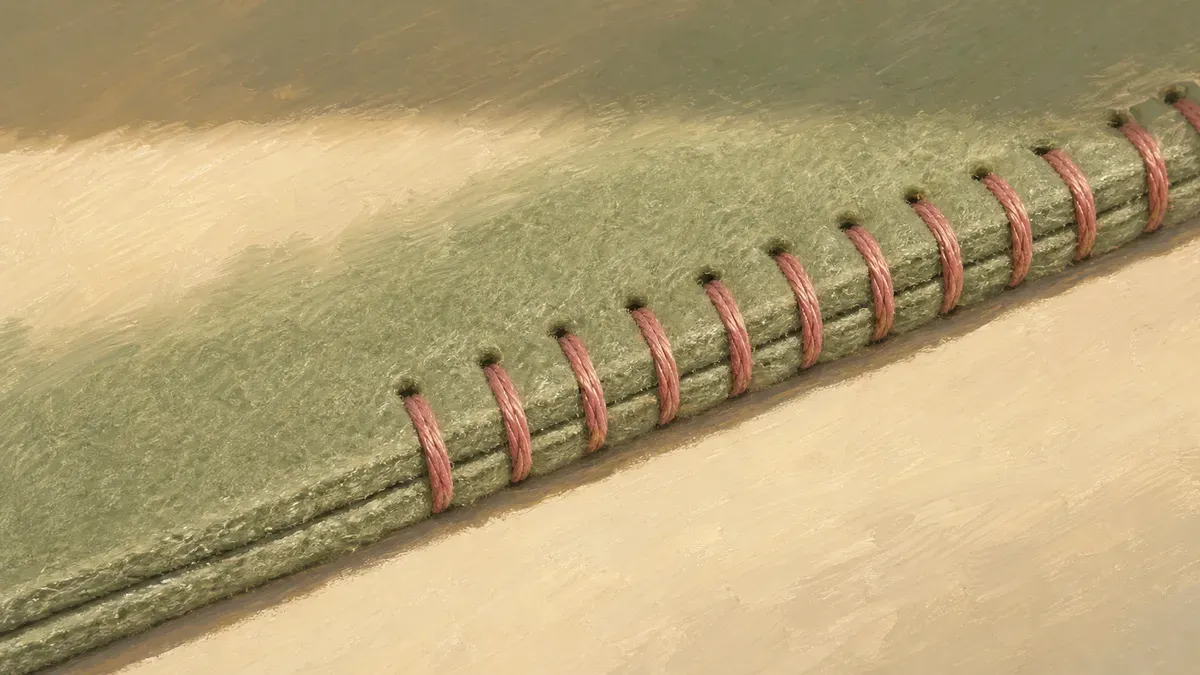
Reinforce the spine edge first. Run a line of backstitch or a strip of glued felt down the side that takes the rings, because that edge carries the whole book’s weight when a 3-year-old dangles it by one page. Skip the reinforcement and you will be repairing torn holes by month two.
- Binder rings: punch holes down the reinforced edge and clip the pages on. The book opens completely flat, and you can swap pages as your kid grows.
- Stitched spine: sew the spine instead of using rings. The sew quiet book walk-through covers the full method.
Either way, you end up with a durable little book that opens flat in small hands.
How Many Pages and What to Put on Them
Now that the binding holds together, the next two questions are how big to make it and what each page should actually do. Start small on both, then grow.
A Realistic First-Book Page Count
Six to eight pages is the sweet spot for a first book. That gives you a handful of double pages to fill, finishes in a weekend, and keeps a beginner from burning out halfway through page twelve. Eight is a nice target if you want a fuller book, since an even count keeps every page backed by another and the spine sitting square on the rings.
The best part of building on binder rings is that you are never locked in. Done with eight? Pop the rings, slide in two more pages next month, snap them shut. The book grows with your kid, and each new page comes out as durable as the first. When I planned my quiet book, page count was the first thing I second-guessed, so if you want the full breakdown, here is many pages should quiet book have for different ages and skill levels.
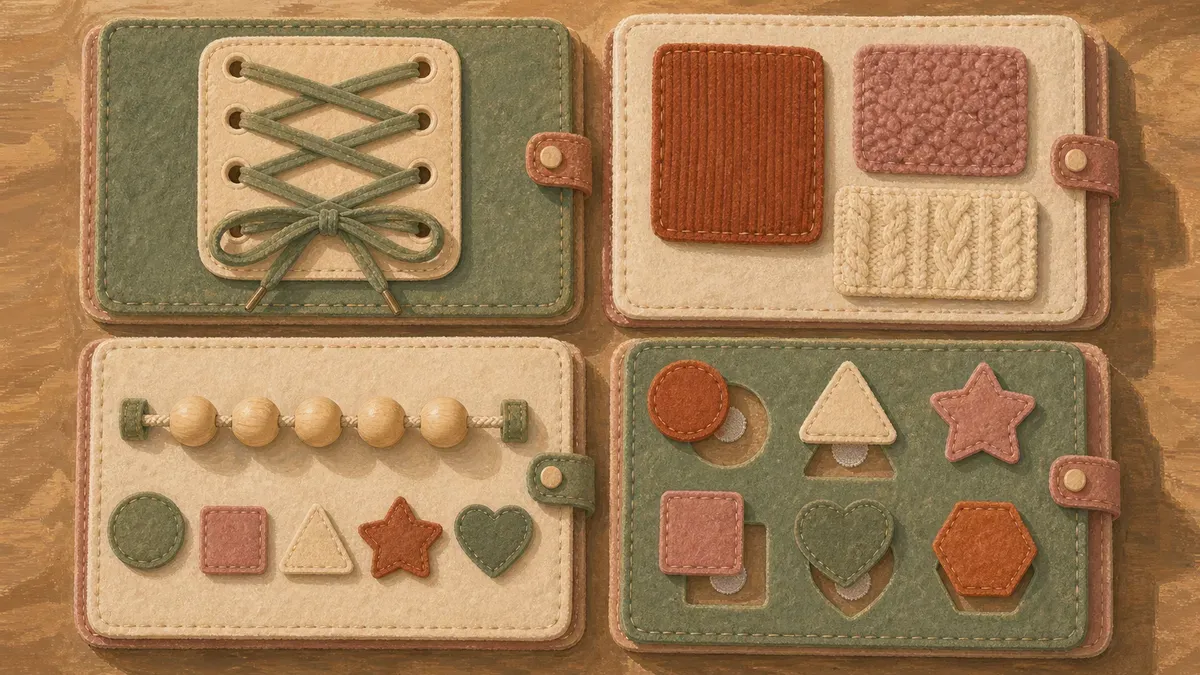
Beginner-Friendly Activity Ideas
Pick pages your kid will actually touch, not the prettiest ones. Five easy wins:
- Lacing cards (a felt shape with punched holes and a shoelace to thread)
- Texture squares (felt, sandpaper, bumpy fabric, a swatch of fleece to feel)
- A button snake (felt strips your toddler buttons onto a ribbon)
- Counting beads (beads on a cord with felt numbers to match)
- A simple shape match (velcro shapes that stick to their outlines)
These are not just busywork. Occupational therapists reach for lacing cards because, as the research on fine motor skill development in toddlers at the OT Toolbox lays out, one card works five distinct fine motor skill areas at once, from a pincer grasp to motor planning. Those two alone will carry a first book.
Build the easy pages first, get a small win under your belt, and the harder ones stop feeling so far off.
Avoid the Mistakes That Wreck a First Quiet Book
Most first felt activity books don’t fail because of the wrong page idea. They fail for four fixable reasons.
- Skipping reinforcement on the spine edge. This is the step most beginners skip even after reading the build order, so don’t.
- Too much fabric glue on velcro. A thin bead is enough. Pile it on and the velcro base lifts anyway once a toddler yanks the loose piece hard enough. Press it, let it cure fully, then test by pulling the piece yourself before you hand the book over.
- Loose pieces that are too small. Anything a child can fit in their mouth becomes a hazard fast. Keep loose activity pieces at least an inch and a half wide.
- Binding an uneven page stack. An odd page count makes the spine sit crooked on the rings. Even count, matched sizes, and the book lays flat every time.
The dedicated bind quiet book guide covers ring choices and spacing in full.
Get those four things right and a durable book is almost inevitable. The materials do the rest.
Pick a Pattern and Start Your Next Book
Once you finish your first book, you’ll want to make another one. That’s the pattern with this project: one weekend of figuring it out, then a second book that goes twice as fast.
For your second book, find a free template before you cut anything. Dozens of beginner-friendly tutorials exist online with printable pages you trace onto freezer paper. A good template gives you the exact dimensions and all the small pieces labeled, so you spend your time stitching instead of second-guessing measurements. Start with a single-skill page, like a zipper or a buckle, and build outward.
If you’d rather browse what other makers have designed, you can explore our full collection of busy book guides for page ideas sorted by skill level and age. For a ready-to-print starting point, the beginner quiet book patterns on this site include the pieces, page count, and binding guide in one file.
You started from scratch. The next one already has a head start.
Found this useful? Save it for the next rough afternoon.
Questions parents ask me about this
How do I make a quiet book from scratch?
Cut your felt pages to a consistent size (around 8 inches square works well for a first book), then design one activity page at a time and finish each one completely before moving to the next. Add your interactive pieces with velcro, buttons, or lacing, reinforce the spine edge of every page, and bind the finished stack with binder rings. Starting with 6 to 8 pages keeps the project weekend-doable without getting overwhelming.
How long does it take to make a quiet book?
A simple 6-to-8-page book with basic activities takes most beginners a full weekend, spread across a few focused sessions. Prep work like cutting and tracing templates is the slowest part; once your pages are cut and your method is set, the pages go faster. Your second book will take noticeably less time because the planning is already done.
What is the cheapest way to make a quiet book?
Buy acrylic felt from a craft store, use fabric glue instead of sewing, and stick to simple activities like texture squares and lacing cards that need minimal materials. Skip specialty closures; basic velcro from a sewing notions aisle costs very little. Free patterns are easy to find online, so you can plan your pages before buying anything.
Can I make a quiet book without sewing?
Yes. Fabric glue and fusible webbing hold applique pieces securely on pages that won't take heavy daily abuse. For pieces that get pulled on constantly (velcro tabs, lacing holes), a few backstitches by hand add a lot of longevity, but it's not required to start. A no-sew book is a perfectly good first project.
What age is a quiet book best for?
Most quiet books suit kids roughly 18 months to 5 years, but the activities matter more than the age. Simple texture and large-piece pages work for the toddler crowd; buttons, lacing, and counting activities are better suited for 3-and-up once small-piece choking risk is lower. For kids under 2, make sure every piece is at least 1.5 inches and nothing can pull off and go in the mouth.
How do I store and clean a felt quiet book?
Store it flat or hang it open so the pages don't warp. Felt cleans up with a lightly damp cloth for surface grime; spot-treat with a little mild soap and let it air dry fully before the book closes. Avoid soaking felt pages, which can cause pilling and distortion.
Where can I find free quiet book patterns?
A quick search for "quiet book template" or "felt activity page printable" turns up plenty of options on craft and parenting blogs. Look for patterns that include piece sizes and a binding guide rather than just photos, so you're not guessing at scale. Once you have one solid free template under your belt, making your own pages from scratch gets much easier.
Written by
Nora Hayes
Mom of two and a former preschool aide. I share the screen-free sensory play and calm-down ideas I test at my own kitchen table, plus what the moms in my little meet-up swear by. A parent passing on what works, not a doctor or a therapist.
More about NoraKeep going
All Quiet & Busy Books-
 Quiet & Busy Books
Toddler Activity Book: 25 Quiet Page Ideas to Make
25 toddler activity book page ideas your kid will actually sit still for, plus the felt, Velcro, and binder-ring steps to build each one at home.
-
 Quiet & Busy Books
Quiet Book Patterns: A Beginner's First Felt Page
New to felt? These beginner quiet book patterns walk you through your first page step by step, with real costs and rookie mistakes. Start today.
-
 Quiet & Busy Books
Toddler's Busy Book: Best Pages for 2-Year-Olds
Which busy book pages actually hold a 2-year-old? Build a toddler's busy book they won't rip with the 8 pages that teach real skills. Start here.
-
 Quiet & Busy Books
Infant Busy Book: Best Soft, Safe First Picks
Most busy books are built for toddlers. Here's the infant busy book that's truly newborn-safe: soft pages, high contrast, washable.