Quiet Book Patterns: The Felt Page I Wish I'd Had

Easy felt quiet book patterns live in free template libraries like The Yellow Birdhouse and Sew Much Ado.
Turn one into a finished page in three moves: pick a single simple design, gather a short supply list, then cut and stitch.
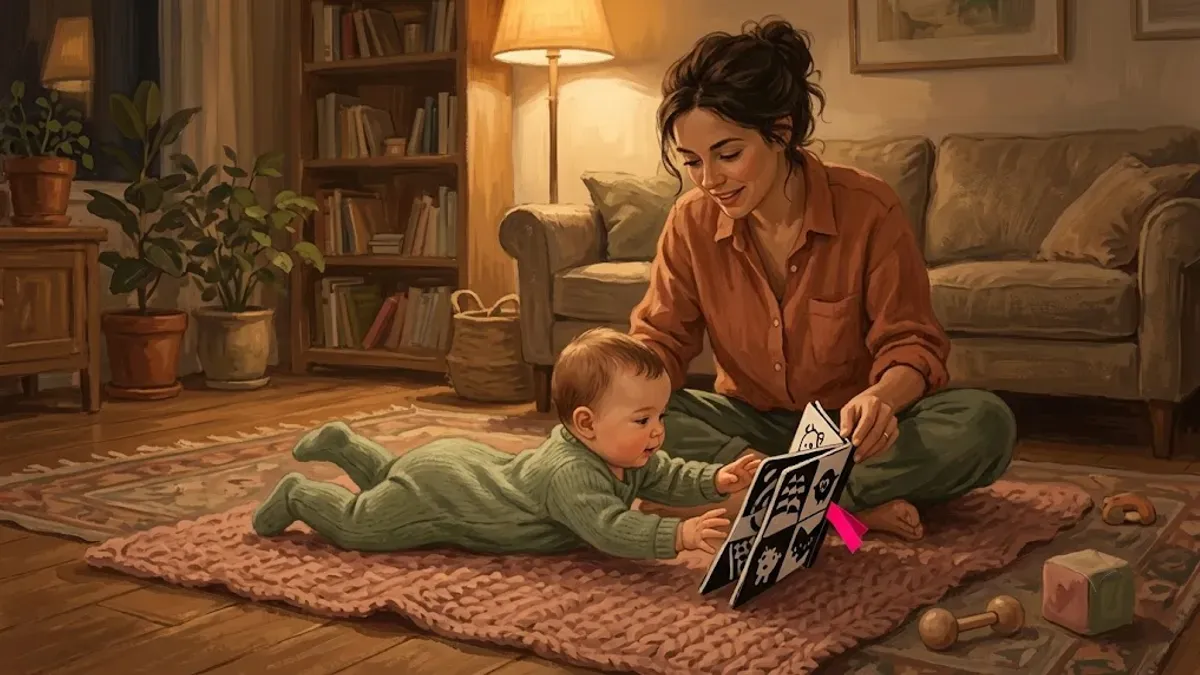
I’m Nora Hayes, a former preschool aide who started sewing felt pages out of necessity for my autistic son; I promise your first page does not need to be the whole book, and this guide walks you to a pattern, the handful of supplies you actually need, and the steps that take a blank square of felt to a page your kid will paw at on the couch.
The plan in brief:
- Pick one simple felt page pattern (shapes, colors, or a button flap) instead of a full book.
- Gather stiffened felt, embroidery floss, and fusible web for under $20.
- Cut, applique, and whip-stitch the page in about two hours before adding it to a binding.
Start Here: Your First Felt Page in Three Moves
A beginner felt page comes together in three moves: pick one small page, cut and stitch the felt pieces, then add that page to a binding. Do them in order and you finish something tonight instead of staring at a half-cut mess on the kitchen table next week.
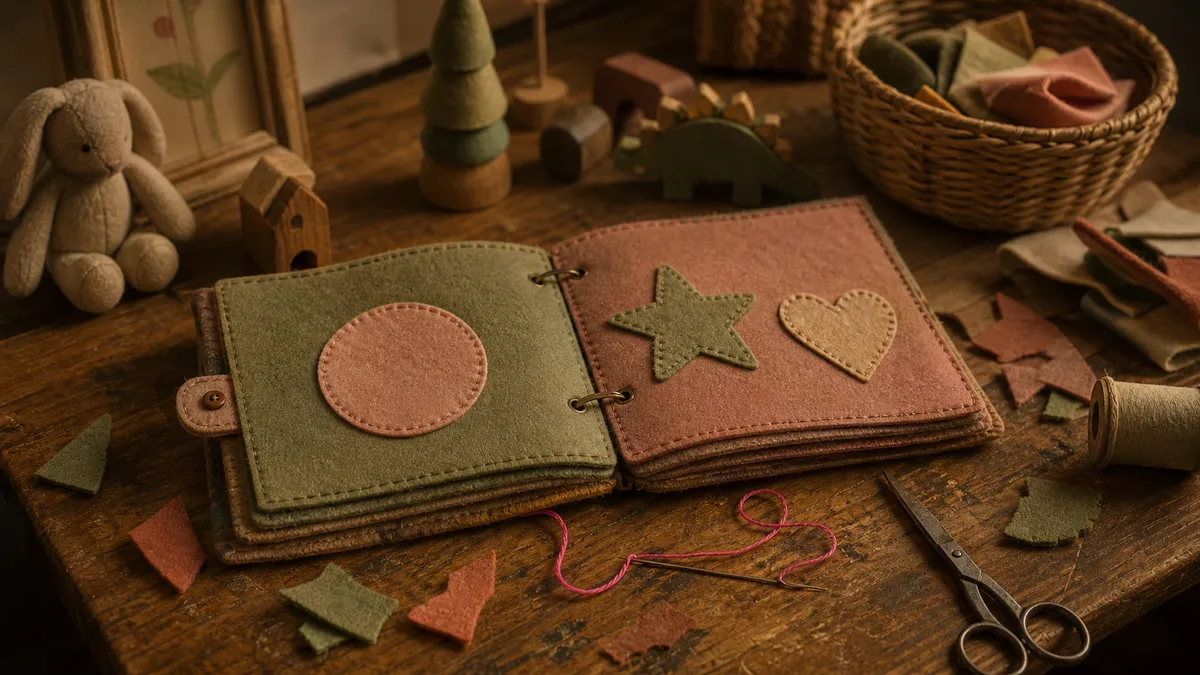
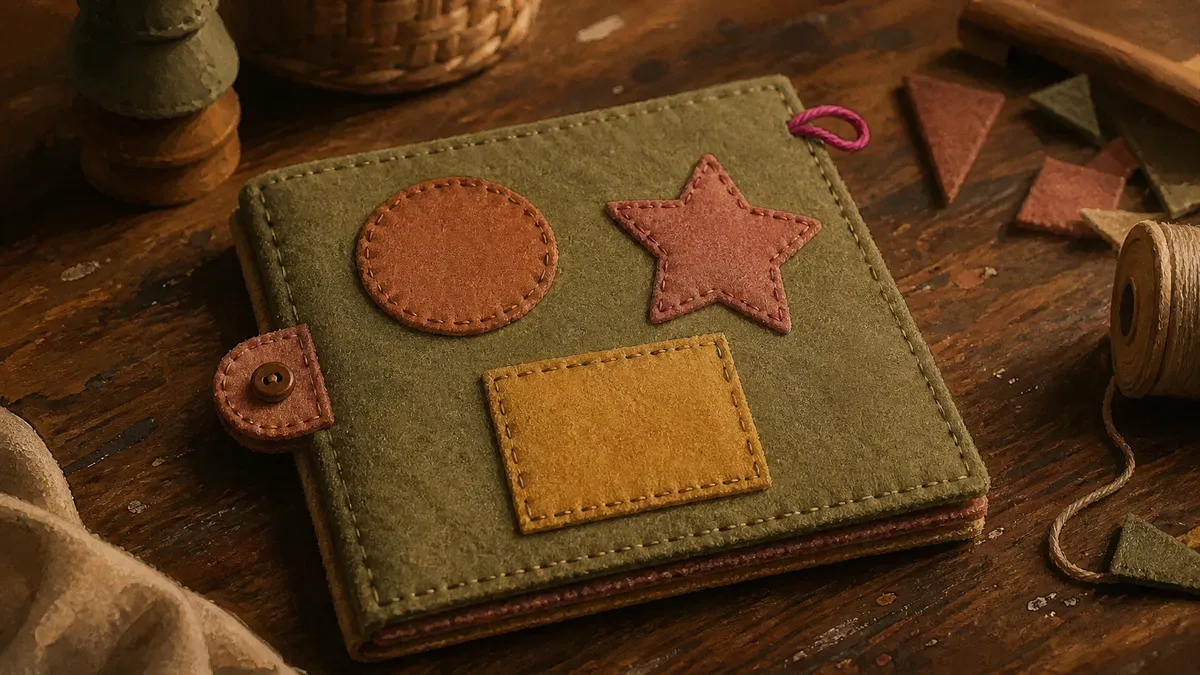
Choose One Easy Page, Not a Whole Book
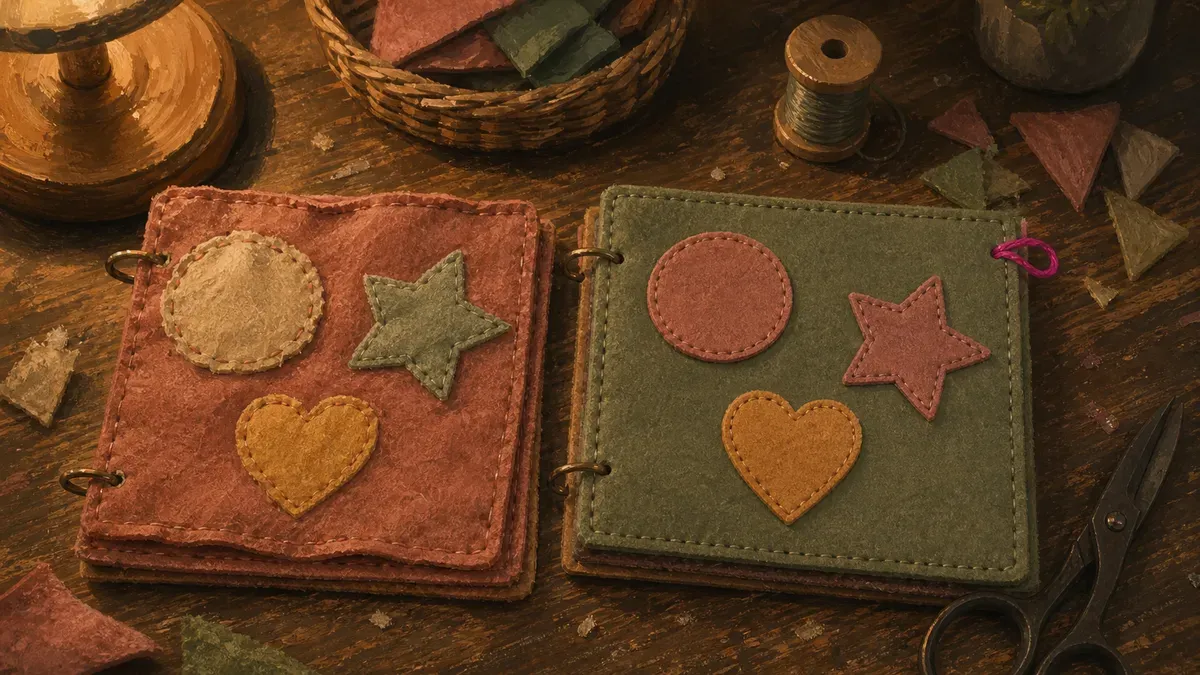
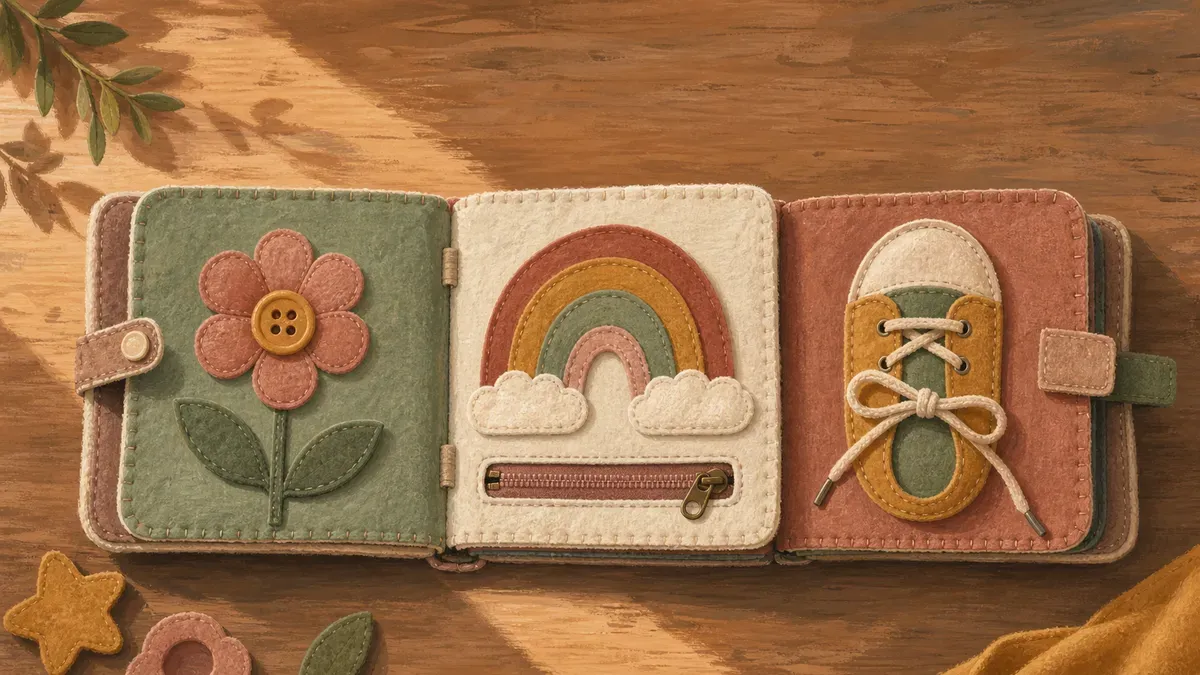
Pick the smallest page you can imagine and make only that. A shape-matching page, a four-color sorting page, or one simple flap your toddler can lift. That is the whole assignment.
The reason is plain. A full book is twelve pages of decisions, and decisions are exactly what you do not have energy for after a long day. One page is finishable in an evening, and a finished page is what keeps you sewing.
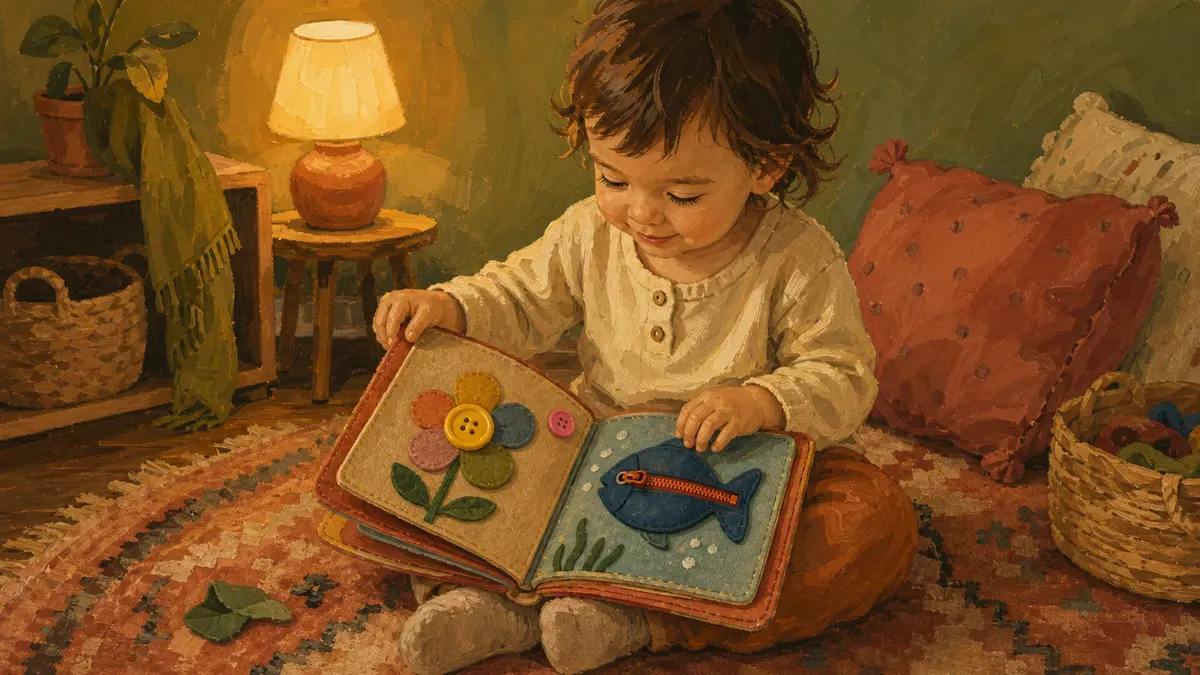
A finished page your kid actually paws at beats a perfect book you never finish.
Go for something interactive that pays you back. A flap to lift, a button to match, pieces to move around. Those are the pages that hold a toddler and sneak in a little fine motor work at the same time, which is the quiet sell of the whole thing. June, my three-year-old, ignored a gorgeous busy page I labored over and obsessed for weeks over a plain felt door with a felt cat behind it. Cheap thrill, big win. Start where the win is easiest.
Cut, Applique, and Stitch the Page
The construction loop is the same on every page once you learn it the first time.
- Trace your template pieces onto felt with a washable marker or chalk.
- Cut each shape out, no seam allowance needed.
- Fuse or pin the pieces onto your backing page.
- Whip-stitch around the edges in embroidery floss.
The forgiving part is the felt itself. It does not fray, so your applique pieces do not need a sealed edge the way woven cotton would, which makes a diy felt book far kinder to a beginner than a regular sewing project.
For the fusing, I lean on HeatnBond Lite. - Hold the iron at low heat for 6 seconds per section so the fusible web grabs without scorching the felt fibers, per the QuiltSocial applique guide.
- Keep the temperature down. Run it too hot and you melt the very pieces you just cut.
- If the bond feels weak, press again rather than cranking up the heat.
Then stitch. A simple whip-stitch around each shape locks it down for real, because fusing alone peels under toddler hands. I built my first page across about two evenings, and the stitching is where it stopped feeling like a craft and started feeling like a toy that would survive my kid. If you want the full from-scratch walkthrough later, my guide on how to make a quiet book takes it page by page.
Add the Page to a Binding
One page is a toy. A few bound together is a real book, and the binding is what turns your felt book diy from a single square into the start of something your kid carries around.
Three easy ways to bind, easiest to most durable:
- Binder rings through grommets. Punch grommets in the edge, loop in rings, done. Biniboo suggests 3-inch rings for young children.
- Cord or ribbon through grommets. Same grommets, soft cord or ribbon instead of metal. Quieter and gentler for little hands.
- A sewn spine. More work, but Biniboo calls it the most child-proof option, and it keeps pages from going missing.
My honest take: start with rings. They let you add pages one at a time as you finish them, which is the whole point of building slowly. June’s book is still on rings, and we just clip in whatever page got made that month. For more setups and themed ideas, browse our quiet books busy books collection. Three moves, one page, and the assembly of a real busy book is officially underway.
Materials and Tools for a Beginner Felt Book
You don’t need a craft store run for this. The shopping list comes down to three things: the felt, the stuff that holds it together, and a way to cut it cleanly.
Which Felt to Buy (Wool Blend, Acrylic, or Stiffened)
Three kinds of felt sit on the shelf, and the price gap between them is real. Craft felt is 100% acrylic per theyellowbirdhouse.com, the cheapest by a mile, and the one most beginners reach for. Wool blend felt runs 20 to 40% wool per cloudcraft.co.uk, costs more, and holds its shape better. Pure wool is the gorgeous expensive stuff that most of us skip for a first book.
Here’s the honest trade-off, pulled from a comparison of wool and acrylic felt properties:
| Felt type | Cost | Durability | Beginner notes |
|---|---|---|---|
| Craft (acrylic) | £ | Stretches out of shape | Cheapest, easy to find, fine to learn on |
| Wool blend | ££ | Sturdy but can pill | Best all-rounder for pages that get yanked |
| Pure wool | £££ | Highest quality | Lovely, pricey, skip it for book one |
Skip minky and quilting fabric for now. They fray, they need interfacing or batting to hold a shape, and that’s a whole other learning curve. Plain felt cuts clean and stays put.
For a first felt book, buy a stiffened acrylic sheet for the page bases and softer wool-blend scraps for the pieces that get little hands all over them. Stiffened acrylic holds a crisp edge even after dozens of folds; softer wool blend flexes without going limp, which matters once small hands are grabbing and pulling the same piece every day. Now I back the high-traffic pages with the stiff stuff.
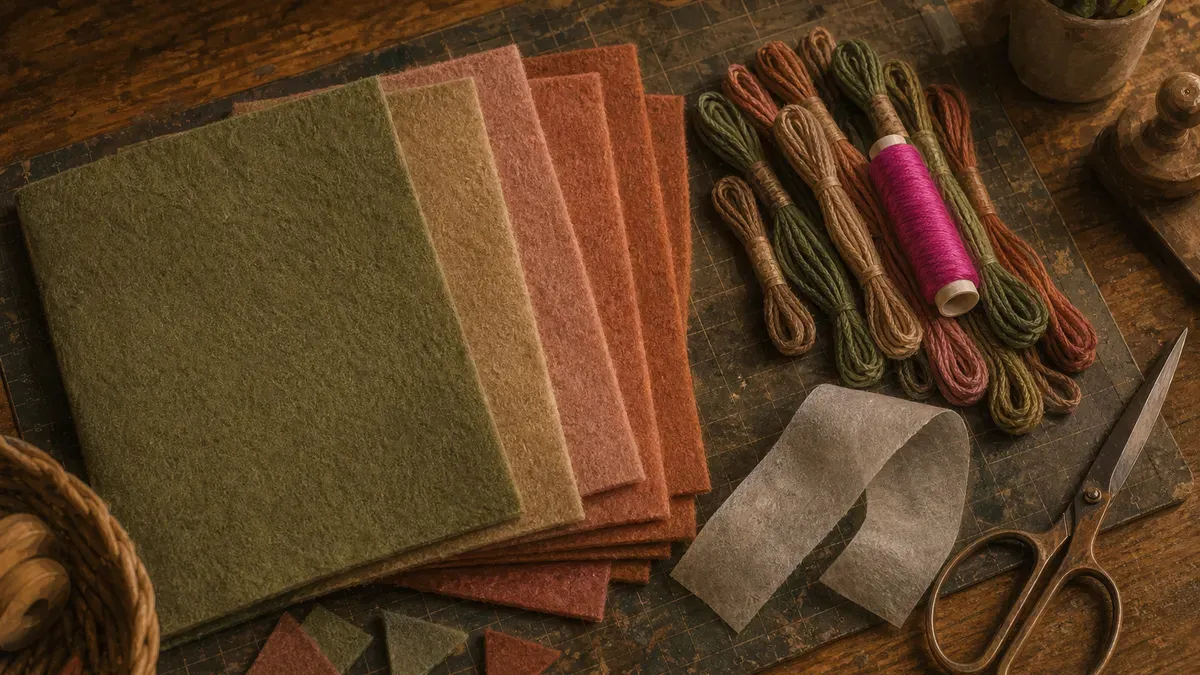
Thread, Fusible Web, and Cutting Tools
Felt is forgiving, so your supporting cast is short. Embroidery floss is the only thread worth using here, because it’s thick, it covers, and it comes in every color. A DMC 36-skein pack runs $19.49 at major craft retailers, with each skein holding 8.75 yards, and a 150-color kit goes for $11.99 as of 2025. One pack outlasts several books.
Fusible web is the optional shortcut that feels essential once you try it.
- Sharp fabric scissors, dedicated, never used on paper (essential)
- A small detail pair for curves and tiny shapes (worth it)
- A rotary cutter and self-healing mat for long straight page edges (nice, not required)
The rotary cutter saved me real time once I was making four pages a month, but for one page, good scissors do everything. Don’t let a $40 cutter stop you from starting tonight.
What a First Book Actually Costs
A first felt book costs $15 to $30 in supplies, which surprises most people who’ve only priced the finished ones on Etsy.
- Felt sheets at about $2 each, ten colors: fabric comes to roughly $20
- Total with careful shopping: $12 to $17 for a personalized book, versus $30 to $50 store-bought
Rough first-book budget: felt sheets around $20, a floss pack you’ll reuse for years, and a few dollars of fusible web. Most of it carries straight into book two and three.
If the cost still feels like a gamble before you’ve sewn a stitch, that’s exactly the math to run when you weigh a felt busy book against a printable. Either way, you’re out less than one restaurant kids’ meal, and you’ve got something that lasts.
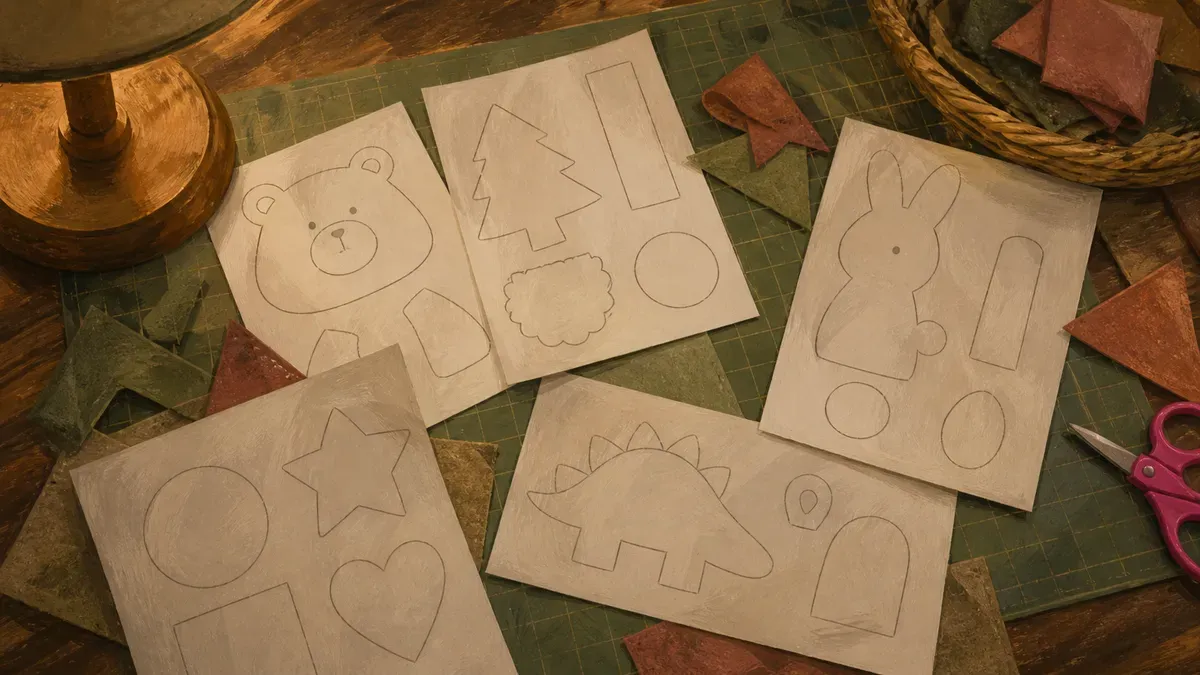
Where to Find Easy Quiet Book Patterns
The cheapest way to start a DIY felt book is to not draw a single thing yourself, and you’ve got three routes: free printables you trace, a paid Etsy pattern that holds your hand, and a first theme that’s basically impossible to mess up.
Free Printable Patterns and Templates
Free templates are how I started, and they’re still where I send any nervous beginner. You download a page, print it on regular paper, and use it as a cutting stencil for your felt. No drawing, no guessing proportions. A couple of the free template libraries I named earlier hand you the shapes already sized to a finished page.
The one thing that trips people up is scale, so a few checks before you cut:
- Print at 100%, never “fit to page.” Your pieces will shrink and stop matching each other.
- Hold the printed sheet against an actual felt square before cutting. If it runs to the paper edge, your finished piece overshoots the page.
- Most free designs are sized for a standard 8-inch square page, which keeps every page the same size when you bind them later.
For more page ideas sized and ready to trace, browse our printable busy book pages collection.
Free gets you moving for nothing. Stitch one of these, see if you even like the work, then decide if a paid pattern earns its keep.
Beginner-Friendly Paid Patterns on Etsy
Free templates give you shapes. A good paid pattern gives you the whole evening planned out, and for some of us, that’s the part worth paying for.
When I bought my first Etsy pattern, I wasn’t paying for prettier pieces. I was paying to stop guessing. The good ones come with clear step photos, a difficulty label so you don’t accidentally start on a zipper page, and instructions that tell you the order of operations. PDF quiet book patterns on Etsy start around $12.50, usually a multi-file download with a step-by-step tutorial.
So when does it beat free? Buy the pattern when you want one cohesive book instead of a Frankenstein of mismatched pages. Buy it when the photos are crisp and the listing names a skill level. And buy it when you’d rather customize a tested page than debug your own.
Skip it for your very first page, then spend the $12 once you know you’ll keep going.
Free to learn the stitch, paid to scale up without the guesswork. That’s the whole call.
Easiest Page Themes to Start With
Whichever source you pick, your first theme decides whether you finish or quit. Some pages are forgiving. Some hide a fiddly closure that’ll have you swearing at 9pm. Start easy.
Here’s how the beginner-friendly themes actually stack up:
| First-page theme | Why it’s easy | Difficulty |
|---|---|---|
| Color matching | Flat shapes, no closures | Easiest |
| Counting | Same flat pieces, just numbered | Easiest |
| Peek-a-boo flaps | One folded square, one stitch line | Easy |
| Button flaps | Adds a single button and slit | Beginner+ |
| Lacing | Punched holes, a cord, lots of patience | Stretch |
My pick for page one is color matching. It looks finished, it survives a 3-year-old, and you’ll have it done before bedtime.
Beginner Mistakes That Ruin a Felt Page
A finished color-match page is a win, but the first one almost never comes out clean. Two things trip up nearly everyone: the build itself, and the small pieces a baby can pull off and swallow.
Sizing and Stitching Slip-Ups
My first felt page puckered along every edge because I cut the base shape the exact size of the template, then tried to stitch right at the rim. There was no room for the needle. Here are the slip-ups I see most, and the fix for each:
- No seam allowance. Leave a small margin of bare felt around each applique so your whip stitch has somewhere to land. Cut the shape, then trace your stitch line a little inside the edge.
- Felt cut too small. A tiny circle looks right against the pattern but vanishes once it’s stitched down. Bump small shapes up a touch before you cut, so they still read clearly on the page.
- Uneven whip stitches. Wobbly spacing is the thing that makes a beginner page look homemade in the bad way. Keep your stitches the same length and the same distance apart, even if that means slowing way down on the first one.
And watch your pins. The team at Eovea Fabric notes that pins leave permanent holes in felt, so keep them inside the seam allowance or switch to fabric clips. I learned that on a felt sun whose center stayed dotted forever.
Keeping Small Pieces Safe for Babies
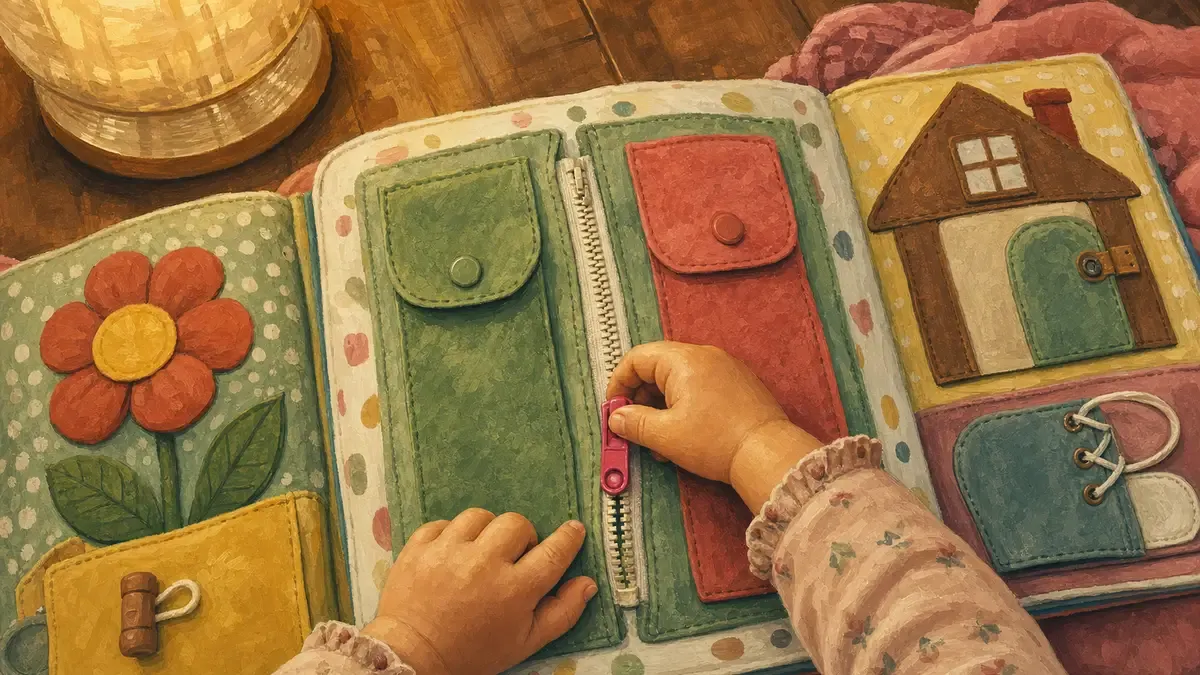
The cutest pages are the riskiest. Buttons, beads, snap-off flaps, and loose Velcro tabs are exactly what a baby will mouth and choke on. The rule is simple: under three, nothing small comes off.
- Sew every piece down. For babies and young toddlers, nothing interactive should detach. No loose tabs, no snap-off flaps.
- Skip buttons and beads. Use felt-on-felt shapes, stitched flaps, and sewn-in textures instead.
- Save removable parts for later. Loose buttons, beads, and lacing cords belong on a page for an older toddler who’s past the everything-in-the-mouth stage.
The small-parts choking hazard guidance for children’s toys from the CPSC defines a small part as anything that fits fully inside a cylinder the size of a young child’s throat, and it bans those parts from toys for kids under three. If a piece fits in there, leave it off the baby page.
When you’re ready to add those, my full sew quiet book walkthrough covers attaching them so they hold. Build the safe version first, swap in the fiddly pieces later.
Grow Your Quiet Book One Page at a Time
One finished page is the hard part. Now you add the next, then a few more, until that single sheet becomes a little book your kid actually reaches for.
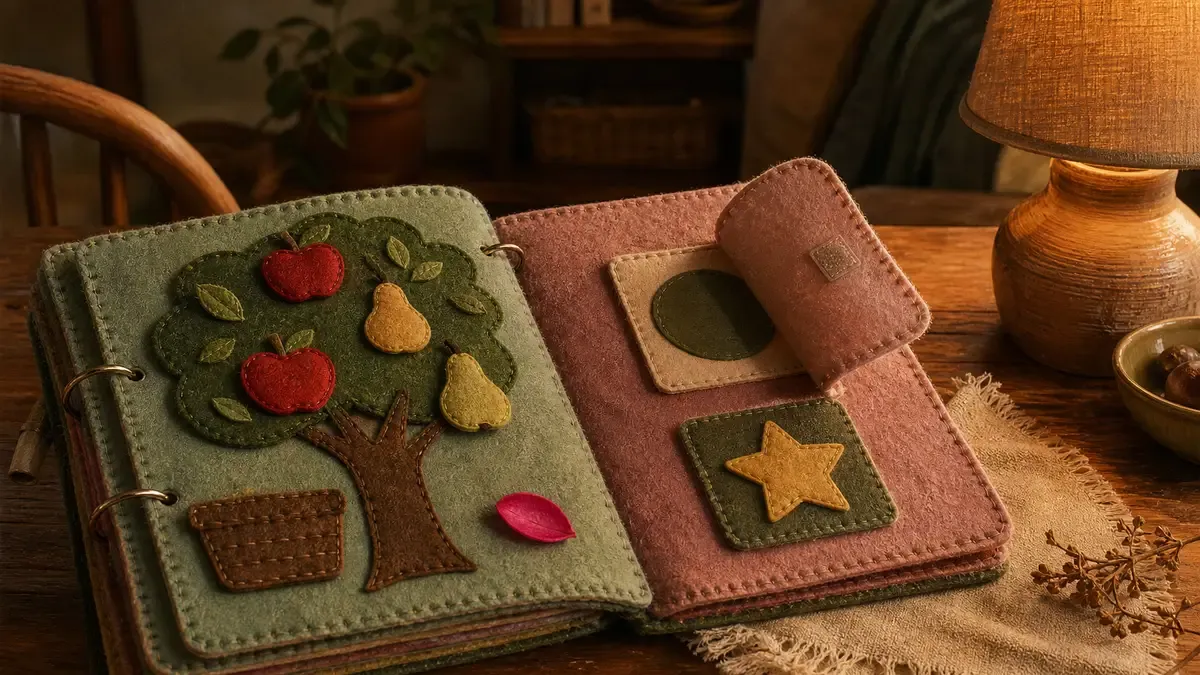
Adding Themed Pages and Activities
The trick is to follow your kid’s current obsession, not a master plan. My nephew was deep in a dinosaur phase, so I made his second page a simple sorting mat with felt dinos in three sizes (big, medium, and small). Eli, my oldest, wanted to count everything at that age, so a number page earned its keep for weeks.
Pick the next page from whatever they’re into right now:
- A shapes or alphabet page when they’re naming things
- A felt dollhouse or dressing page for pretend play and snaps
- A weather or color page to sort and match
- A face page to swap felt eyes, mouths, and moods
You don’t need all of these. Three or four solid pages make a real book, and you can customize as they grow. When you’re ready for more, my roundup of ideas for a toddler activity book sorts themes by skill, and our complete quiet book guide walks the whole build start to finish.
Storing and Caring for Finished Books
Felt holds up to a lot of toddler love, but it does not love the washing machine. Felt, the wool-blend pieces especially, shrinks and warps in hot water and tumbling, which is why care guidance for felt fabric points to hand washing in lukewarm water with mild soap, pressing out the water rather than wringing, and laying the page flat to dry.
For everyday gunk, I just spot-clean. A damp cloth on the sticky spot, a little soap, done. Save the full hand wash for when a page has truly been through it.
Store the busy book flat or standing on a shelf, not crammed spine-down in a bin where the pieces crease. Treated this way, a felt busy book made from sturdy fabric outlasts most plastic toys and gets handed straight to the next kid.
Found this useful? Save it for the next rough afternoon.
Questions parents ask me about this
Where can I find easy quiet book patterns for beginners?
Free printable templates are the easiest starting point. Search for quiet book or felt busy book templates and you'll find full-size, print-and-cut designs ready to trace onto felt. Paid pattern sets step up the experience with construction photos and difficulty labels, which helps when you're not sure how a page goes together. Either way, print at 100% scale and test the size against a felt square before you commit to cutting.
What kind of felt is best for a quiet book?
Stiffened acrylic felt works for the base pages on a tight budget, but it tends to stretch and go floppy with heavy use. Wool-blend felt holds its shape much longer, so it's worth using for any pieces that get grabbed, peeled, and re-attached constantly. A practical split: stiffened acrylic for the book base, wool-blend for the high-traffic interactive pieces.
Do I need a sewing machine to make a felt quiet book?
No. Felt does not fray, so every edge is clean the moment you cut it, and a simple hand-sewn whip stitch around each piece is enough to hold everything toddler-proof. A machine speeds things up if you already own one, but the whole craft is designed to be done by hand. Fusible web under your appliqué pieces also cuts down on pinning and shifting while you stitch.
How long does it take to make one quiet book page?
Plan on roughly two hours for a single page from start to finish. That includes tracing, cutting, fusing or pinning pieces, and whip-stitching the edges. A more complex page with lots of small pieces runs longer; a simple shape-match or color-sort page lands closer to the low end. Spreading the work across two evenings makes it feel manageable without rushing the stitching.
How much does it cost to make a quiet book?
A first felt book typically runs between fifteen and thirty dollars in materials, depending on how many pages you make and what you already have at home. Felt sheets are inexpensive, and a single pack of embroidery floss covers far more stitching than one book needs. Store-bought quiet books cost more, so even a modest DIY version saves money while letting you customize every page to your child's current interests.
What age is a felt quiet book appropriate for?
Most felt quiet books suit children from about 18 months through age five, though the right page design depends more on the child than the number. For children under three, every interactive piece must be sewn down permanently, because loose small parts are a safety hazard at that age. Once a child is past the mouthing stage, you can add buttons, lacing cards, and snap pieces that younger toddlers should skip entirely.
Can you wash a felt quiet book?
Yes, but skip the machine. Hand wash in lukewarm water with a mild soap, then lay the book flat to dry completely before storing or using it again. Felt shrinks in hot water, so always keep the temperature cool and never put felt pages in the dryer. For everyday spills and sticky fingerprints, a damp cloth handles most messes without a full wash.
Written by
Nora Hayes
Mom of two and a former preschool aide. I share the screen-free sensory play and calm-down ideas I test at my own kitchen table, plus what the moms in my little meet-up swear by. A parent passing on what works, not a doctor or a therapist.
More about NoraKeep going
All Quiet & Busy Books-
 Quiet & Busy Books
Toddler Activity Book: 25 Quiet Page Ideas to Make
25 toddler activity book page ideas your kid will actually sit still for, plus the felt, Velcro, and binder-ring steps to build each one at home.
-
 Quiet & Busy Books
Toddler's Busy Book: Best Pages for 2-Year-Olds
Which busy book pages actually hold a 2-year-old? Build a toddler's busy book they won't rip with the 8 pages that teach real skills. Start here.
-
 Quiet & Busy Books
Infant Busy Book: Best Soft, Safe First Picks
Most busy books are built for toddlers. Here's the infant busy book that's truly newborn-safe: soft pages, high contrast, washable.
-
 Quiet & Busy Books
Quiet Book DIY: How to Make One From Scratch Fast
Make a quiet book from scratch this weekend, even if you've never sewn. Get the materials, page count, and step-by-step build. Start today.